|
|
|
| This article is available in: English Castellano Deutsch Francais Russian Turkce |
![[Photo of the Author]](../../common/images/Antonio-C.gif)
by Antonio Castro About the author: I am computer scientist and have had the opportunity to work with several Unix flavors. Furthermore I have done different tasks from software design to system administration. Content: |
![[Illustration]](../../common/images/article108/Estudio.jpg)
Abstract:
In this article we will look at how to use textures. We have described them on a theoretical level already in the previous chapters (I, II, III).
When we design an object in Povray we must decide about two very different things:
We have seen the enormous versatility of Povray when using patterns of colors and different finishes of surfaces, but there is more....
|
|
Many elements have been introduced to illustrate the different techniques in the use of textures. We will learn how to wrap flat, cylindrical and spherical objects using images.
One must notice that the technique of wrapping objects with images very powerful. With a good repertory of textured images almost everything can be done. Someone could be tempted to always use the technique of wrapping with images created by third parties but this way one will never have the creative flexibility that the design of textures in povray provides. We can vary independent patterns, distributions of colours, types of turbulances, intensity of turbulances, etc...
We will accompany the descriptions with illustrations. All the images used for the creation of the scene as well as the complete listings of the pov-code for the scene can be obtained. In tar.gz Format
We will now describe the different aspects and details of the scene.
    |
| Fragment of the main listing |
|---|
#declare Papel = object {
  box { <0,0,0,> <1,1,1>  }
  texture {
    pigment{ image_map { gif
            "gifs/hoja.gif" }
    }
    finish {
     ambient 0.4 diffuse 0.6
    }
  }
  rotate x*90
  scale <12, 0.001, 20>
|
| Example: Disquete.inc |
#declare TamDisquete  = 5;
#declare PortadaDisquete =
          "gifs/disquete1.gif"
#include "Disquete.inc"
object { Disquete
  rotate x*90
  translate <80, -10, 147>
}
|
| Disquete.inc |
#declare Epsil =   0.0001;
#declare Disquete = object {
  box { <0, 0, 0> <1,1,1>
    texture {
      pigment{
        image_map {
      gif PortadaDisquete once
        }
      }
    }
    translate <-0.5,-0.5,-0.5>
  }
//Primero centrar el cubo en <0,0,0>
  translate <-0.5, -0.5, -0.5>
  scale <TamDisquete,TamDisquete,
                    TamDisquete/10 >
}  // end 'Disquete.inc';
|
| Example: Libro.inc |
#declare LargoLibro   = 20;
#declare AnchoLibro   = 12;
#declare GruesoLibro  = 3.5;
#declare PortadaLibro =
          "scan_gif/bookp2.gif"
#declare LomoLibro    =
          "scan_gif/bookl2.gif"
|
| Libro.inc |
#declare Epsil =   0.0001;

#declare TextureLibro = texture {
 pigment {
    gradient z
    color_map {
       [0.0 colour White ]
       [0.1 colour Gray90 ]
       [0.2 colour White ]
       [0.3 colour Gray95 ]
       [0.4 colour White ]
       [0.5 colour Gray80 ]
       [0.6 colour White ]
       [0.6 colour Gray95 ]
       [0.8 colour White ]
       [0.9 colour Gray90 ]
       [1.0 colour Gray85 ]
    }  // end colourmap;
  }  // end pigment;
  finish { ambient 0.3 diffuse 0.7 }
  scale <1, 1, 0.3>
}  // end Texture;

#declare Libro = object {
  union {

    box { <0, 0, 0> <1,1,1>
      texture { TextureLibro }
      translate <-0.5, -0.5, -0.5>
    }

     // Portada del libro;
    box { <0,0, 0>  <1, 1, 1>
      texture {
         pigment{
            image_map {
            gif PortadaLibro once
            }
         }
       }
      translate <-0.5, -0.5, -0.5>
      scale <1-Epsil,
                1-Epsil, 1+Epsil>
    }  // end box;

     // Lomo del libro;
    box { <0,0,0 >   <1 ,1 ,1 >
      texture {
         pigment{
            image_map {
               gif LomoLibro once
            }
         }
      }
      translate <-0.5, -0.5, -0.5>
      scale <1-Epsil,
                1-Epsil, 1+Epsil>
      rotate y*90
    }  // end box;
  }  // end union
  translate <-0.5, -0.5, -0.5>
   // Centrar el cubo en <0,0,0>;
  scale <AnchoLibro,LargoLibro,
          GruesoLibro>
}  // end 'Libro.inc';
|
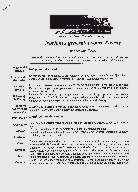
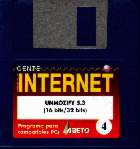
In this section we talk about a technique that turns out to be very useful in wrapping all classes of figures that are similar to a box. In our scene a sheet of paper can be considered to be like a box but totally flat. The floppy disks are have something of a true box as they are as well a few millimeters thick.
In both cases we will only use one image for wrapping an object. We will use in all of them the projection for flat objects. In the case of books we will use one image for the cover and another for the back but we will explain the construction of each one of these objects.
For the sheet of paper it is not necessary to define a cube. The image is projected towards the camera instead of upwards. We rotated the cube 90 degrees on the x-axis for that reason so that the remaining image is turned upwards and we give it the right proportions. We give a thickness to the sheets.
The floppy disks are objects that are done using the include statement. It is necessary to initialize the values that we will use as parameters to set the dimensions of the floppy disk and its image.
On the left side you can see the listing of "Disquete.inc"
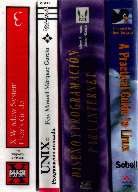
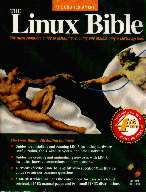
Now it will get a bit more complicated to design the books as there are more parameters needed.
For the surface that represents the back off the book we have to use a gradient pattern.
We construct the book as if it was a perfect cube, center the cube at <0,0,0> and give it the desired dimensions. This way it is easier to calculate the position of the back and the cover that will be placed in the front of the cube. Back and cover are added as if they were boxes we just crush them and make them very thin.
  |
We defined Epsil as an amount sufficiently small to not be seen by the human eye. At the same time it must be sufficiently big enough to not produce divisions by zero or strange effects in flat surfaces of different objects that occupy exactly the same position.
On the left you see the include file used for the books. We leave it as an exercise for the reader to construct a more generic object that accepts six images, one for each edge.
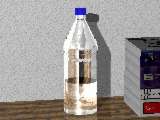
Below you see some patterns with stripes. They represent the relief of a surface and we will use them to decorate a glass like carved glass. We are using the image as a pattern to alter the normal component in the different points on the object. You can click on the images to see more details.
 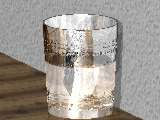   |
The glass is a cone trunk where we simply have to add another interior trunk, slightly more strait, and with the right length to end at the level of the water. Crystal and water are therefore the same thing. This is because we assumed for simplicity that water and glass have identical coefficients of refraction. The result is a geometric form made of a single material. This is very appropriate because it is known that the glass with water becomes almost invisible due to the proximity of its refractive indices.
The bottle of water has to be elaborated a bit more because it is composed out of several simple combined forms (cylinders, trunks of cones and fragments of sphere) but this is an aspect that is of no interest for us in this present article, we will only say that the used technique is the same as for the glass. It's just a more complex object.
Sometimes we have the possibility to choose between using a pattern generated by Povray or using an image. The walls would have perfectly been represented by the pattern type bump with a suitable colour map.
 |
As we need to project this texture on the two walls of the corner we rotate the texture 45 degrees with regards to the y-axis. This would cause a scale distorsion for this reason we will correct the scaling adequately.
This detail can be seen final listing of the scene.
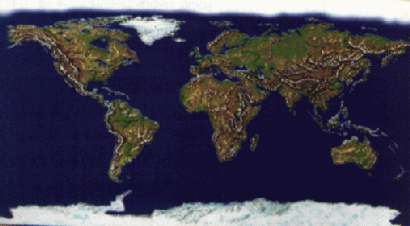
The object is easier to build than it seems at first view. In the other example we projected colour but the projection is as well appropriate for spherical bodies. 'map_type 1' the socket is of bronze and the foot is of wood. Using Povray's own catalogue of generated textures we can choose the wood we like the most. In this case we have used 'DMFDarkOak'.
Although the globe is constructed with simple forms it is interesting to see in what order it has been composed. All we know is that it is not the same to combine the parts of the object in any order. In this case there are several axes to place the parts adequately.
All this can be seen in the complete listing at the end.
|
|
We could talk about some more objects of this scene like the tumbler, the pencils, the ground, the table but there is not much to say that would stand out except that in the case of the table we have used a texture and modified its brightness + luminosity until it looks like the polished table you see in the scene.
Once all the elements are placed it is always worth the trouble to return to the code and test some variation in the illumination. We have used a general illumination situated near the ceiling and a center.
![[the scene]](../../common/images/article108/Estudio.jpg)
You can click on the image of the final scene to see it brighter and bigger.
To finish the article we reproduce the complete listings of the scene.
| Final Listing Estudio.pov | |
|---|---|
////////////////////////////////////////////
//
//     Autor: Antonio Castro Snurmacher
//
////////////////////////////////////////////


#include "colors.inc"
#include "textures.inc"
#include "glass.inc"

#declare Plastico = finish {
      ambient 0.4
      diffuse 0.45
      reflection 0.15
      phong 0.3
      phong_size 20
}

#declare Camera_pl_general = camera {
  location <0,45, -20>
  look_at <80, -20, 200>
  angle 20
}
#declare Camera_detalle_vaso = camera {
  location <0,45, -20>
  look_at <97,-6, 170>
  angle  3.2
}
#declare Camera_detalle_botella = camera {
  location <0,45, -20>
   look_at <45,0, 190>
  angle  8
}
#declare Camera_detalle_papel = camera {
  location <0,45, -20>
   look_at < 85, -10, 145>
  angle 10
}

//camera { Camera_detalle_botella }
//camera { Camera_detalle_vaso }
//camera { Camera_detalle_papel }
camera { Camera_pl_general }


// Fuente de luz blanca en el techo
  light_source {
  <0, 40, 90>
  color White
  }

// Fuente de luz tenue de mesa
  light_source {
    <0, 40, 190>
    color White
    spotlight
    radius 8
    falloff 12
    tightness 10
    point_at
   // < 70, -10, 160>
    < 65, -10, 155>
  }


#declare Cubilete = object {
   intersection {
     cylinder { <0,0,0> <0,6,0>   2 }
     cylinder { <0,1,0> <0,6.5,0> 1.9
               inverse }
   }
}

#declare GloboTierra = object {
   union{
      union{
         sphere { <0,0,0> 1
            texture {
               pigment{
                  image_map {
                     gif "gifs/geoideok.gif"
                     map_type 1  // Esfera
                  }
               }
               finish { Plastico }
            }
            interior{ I_Glass}
            //rotate y*25
            rotate y*-25
         }
         cylinder { <0,-1.28, 0>
                    <0, 1.28, 0> 0.1
              texture {
                  Bronze_Metal }
          interior{ I_Glass}
         }
         intersection {
              sphere { <0,0,0> 1.28 }
              box { <0,-1.5,-0.06>
                    <1.5, 1.5, 0.06> }
              sphere { <0,0,0> 1.1 inverse }
              texture {
                Bronze_Metal }
                   interior{ I_Glass}
             }
         rotate z*-20
      }
      union{  // pie
         cylinder { <0, -1.1, 0>
                    <0, -1.8, 0> 0.15
              texture { Bronze_Metal }
              interior{ I_Glass}
         }
         cone { <0, -1.8, 0> 1
                <0, -1.6, 0> 0.7
              texture {
                  pigment { DMFDarkOak }
                  scale <0.3, 0.3, 0.3>
              }
            interior{ I_Glass}
         }
      }
   }
   translate <0, 1, 0>
   scale <7,7,7>
}


#declare VasoAgua = object {
   intersection {
   cone { <0, 0, 0> 2.5  <0,7,0> 2.9 }
   cone { <0, 4, 0> 2.45 <0,7.5,0> 2.8
          inverse }
   }
   texture { Glass2
    normal {
      bump_map {
        gif "gifs/vaso_norm.gif"
        map_type 2    // Clindro
        bump_size  0.5
      }
    }
    scale <7,7,7>
  }
  interior{ I_Glass}
}

#declare BotellaAgua = object {
  union {
    intersection {
      merge {
        cylinder { < 0, 18.1, 0>
                   < 0, 20  , 0>  0.9 }
        cone     { < 0, 14  , 0>  2.9
                   < 0, 18.1, 0>  0.9 }
        sphere   { < 0, 12.5, 0>  3.3 }
        cylinder { < 0,  0  , 0>
                   < 0, 12  , 0>  3.2 }
      }
      merge {
        cylinder { < 0, 18  , 0>
                   < 0, 20.1, 0>  0.8 }
        cone     { < 0, 13.9, 0>  2.8
                   < 0, 18.0, 0>  0.8 }
        sphere   { < 0, 12.4, 0>  3.2 }
        cylinder { < 0,  6  , 0>
                   < 0, 12.5, 0>  3.1 }
        inverse
      }
      texture { Glass2
        normal {
          bump_map {
            gif "gifs/botella_norm.gif"
            map_type 2    // Clindro
            bump_size 1
          }
        }
        scale <15, 15, 15>
      }
      interior{ I_Glass}
   }
|
   cylinder { < 0, 20, 0>
              < 0, 19, 0> 1.1 // Tapon
       texture {
         pigment {Blue}
         finish { Plastico }
       } // fin Tapon
       interior{ I_Glass}
     }
  }
}

#declare Papel = object {
  box { <0,0,0,> <1,1,1>  }
  texture {
        pigment{ image_map { gif
                         "gifs/hoja.gif" }
        }
        finish { ambient 0.4 diffuse 0.6 }
  }
  interior{ I_Glass}
  rotate x*90
  scale <12, 0.001, 20>
}

#declare RadLapiz = 0.3;
#declare Lapiz = object {
  union {
     cylinder { <0,0,0> <0,7.5,0>
        RadLapiz
        texture { pigment { DMFDarkOak }}
        interior{ I_Glass}
     }
     cylinder { <0,7.5,0> <0,8.5,0>
        RadLapiz
        texture { Gold_Metal }
     }
     cone { <0,0,0>RadLapiz <0,-0.8,0>
        0.1
        texture { pigment { White_Wood } }
        interior{ I_Glass}
     }
     cone { <0,-0.8,0> 0.1 <0,-1, 0> 0
        texture { pigment { Black } }
        interior{ I_Glass}
     }
  }
}

#declare Paredes = object {
    box { <-100,-50, -50> <100,80, 200> }
    texture {
        pigment{ image_map { gif
                      "gifs/gotelet.gif" }
        }
        finish { ambient 0.3 diffuse 0.6 }
        rotate y*45
        scale <5, 7, 5>
    }
    interior{ I_Glass}
}

#declare TextuSuelo = texture {
   pigment { checker color Black color Blue}
}

#declare Suelo = object {
    plane { y, -49.9 }
    texture { PinkAlabaster }
interior{ I_Glass}
}

#declare Mesa = object {
  union {
     box { < -80, -10.001, 140>
           < 100, -13    , 200> }
     box { < -79, -50, 141>
           < -75, -10, 145> }
     box { <  99, -50, 199>
           <  95, -10, 195> }
     box { < -79, -50, 199>
           < -75, -10, 195> }
     box { <  99, -50, 141>
           <  95, -10, 145> }
  }
  texture {
            EMBWood1
            rotate y*90
            rotate x*90
            scale <5,5,5>
     finish {
        ambient 0.1
        diffuse 0.1
        specular 1
        reflection 0.2
        roughness .1
     }
  }
interior{ I_Glass}
}

object {GloboTierra
   translate <90, -4, 190>
}
object { Paredes }
object { Suelo }
object { Mesa }
object { Lapiz
   rotate z*10
   translate < 70, -10, 165>
}
object { Cubilete
   translate < 70, -10, 165>
   texture { pigment { White_Wood } }
   interior{ I_Glass}
}
object { VasoAgua
   translate <97,-10, 170>
}
object { BotellaAgua
   translate <45,-10, 190>
}


object { Lapiz
   rotate z*90
   translate < 80, -10+(RadLapiz/2), 155>
}

object { Papel
   rotate y *-30
   translate < 85, -10, 145>
}

// ***** Libro LinuxBible *****
#declare LargoLibro   = 20;
#declare AnchoLibro   = 12;
#declare GruesoLibro  = 4.5;
#declare PortadaLibro =
           "gifs/bookp2.gif"
#declare LomoLibro    =
           "gifs/bookl2.gif"
#include "Libro.inc"
object { Libro
   rotate x*90
   rotate y *-60
   translate <36, -10, 165>
}

// ***** Varios Libros *****
#declare LargoLibro   = 20;
#declare AnchoLibro   = 12;
#declare GruesoLibro  = 13;
#declare PortadaLibro =
         "gifs/bookp1.gif"
#declare LomoLibro    =
         "gifs/bookls1.gif"
#include "Libro.inc"
object { Libro
   rotate x*90
   rotate y *-90
   translate <55, -10, 195>
}

#declare TamDisquete  = 5;
#declare PortadaDisquete =
            "gifs/disquete1.gif"
#include "Disquete.inc"
object { Disquete
  rotate x*90
  translate <80, -10, 147>
}

#declare TamDisquete  = 5 ;
#declare PortadaDisquete =
        "gifs/disquete2.gif"
#include "Disquete.inc"
object { Disquete
  rotate x*90
  rotate y*30
  translate <90, -10, 165>
}
// vim: set sw=2 ts=2 et :
|
|
|
Webpages maintained by the LinuxFocus Editor team
© Antonio Castro, FDL LinuxFocus.org Click here to report a fault or send a comment to LinuxFocus |
Translation information:
|
2001-04-27, generated by lfparser version 2.13